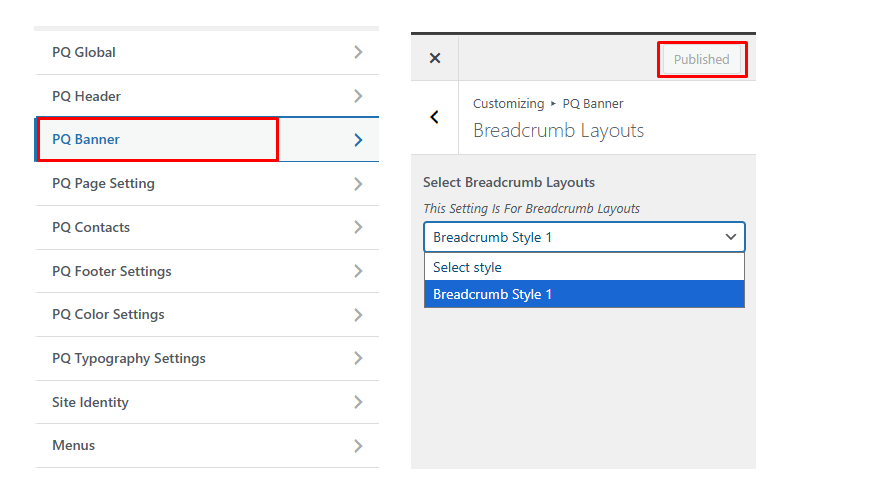
PQ Banner
Refer to the steps below to set the banner : Refer to the steps below to set and customize your site banner :
Go to Appearance → Customizer → Banner Layout.
From there, you can set and customize your banner layout according to your preferences.
This banner functions as a global banner, meaning it will automatically appear on all pages of your website.

You can also set a specific banner for any individual page using ACF. To do this, follow these steps:
Go to the specific page where you want to set a custom banner.
Click Edit Page.
Scroll down to find the Advanced Options section.
Under Banner Options:
Set Hide Banner to No.
Set Set Separate Banner to Yes.
Then, select your desired banner from the Banner Options dropdown.
If you set Set Separate Banner to No and Hide Header to Inherit,, the page will automatically inherit the global Banner selected from the PQ Banner option.

Refer to the steps below to edit the banner : You can customize the banner in multiple ways. You can edit it directly using Elementor, which gives you full control over the design and layout.
Banner Style Options – You can edit the banner directly from your WordPress Dashboard by navigating to Appearance → banner Style.
Edit with Elementor – Open the banner directly in Elementor to have full control over its design, layout, and content.
Edit from a Specific Page – You can also open any page using Edit with Elementor and make changes to the banner while previewing how it looks on that specific page.
Please refer to the images below for detailed visual guidance.
Edit Banner From WordPress Dashboard -> Banner Styles Option

Edit Header From Site Page Once The Page Is Open In Elementor, You’ll Be Able To Edit
